Astrohosts Support
Email: Outlook (Express)
Support Menu |
|||||||||||||||||||||||||||||||||||||||
|
|||||||||||||||||||||||||||||||||||||||
| Step 1: Run Outlook Express and from the Tools menu select Accounts... |
| Step 2: Click on the Mail tab, then click on Add >
|
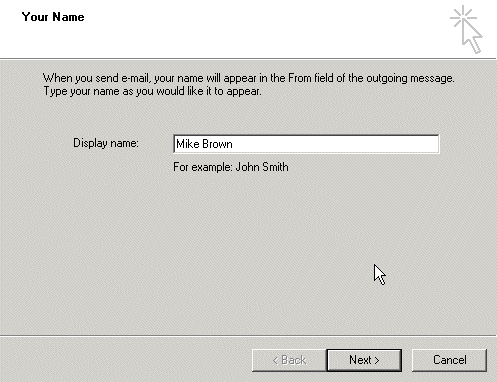
| Step 3: Type in your name
Then click on Next > |
| Step 4: Enter your new email address in full
Then click on Next > |
Step 5:
Then click on Next > |
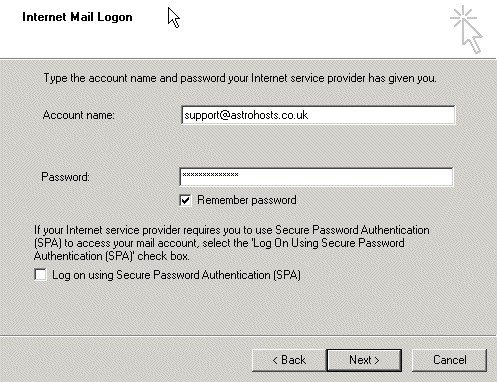
| Step 6: Enter your username and password. Hint: Your username is your full email address.
Step 7: Hint: not checking remember password will cause the program to ask you for your password every time you check for mail. This additional security may be appropriate if you share your PC with others. Do not tick Log on using Secure Password Authentication |
| Step 8: Click on Finish
|
| Step 9: Highlight the account you have just created and click on Properties
|
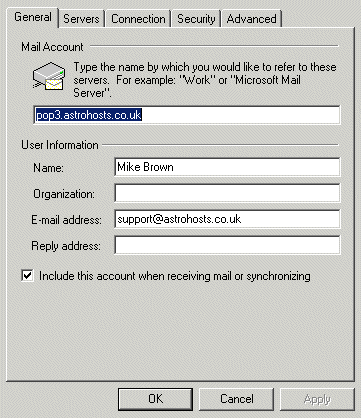
| Step 10: Check the details on the General tab. At this point you can add the name of your Organisation if you wish. This will appear in the header information of each email you send.
|
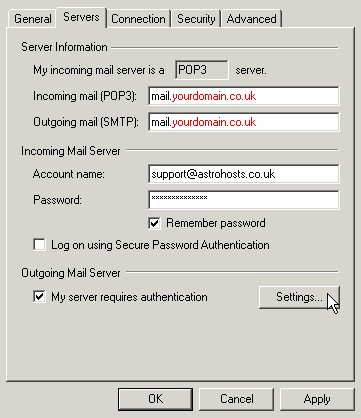
| Step 11: If you entered mail.yourdomain.co.uk as your outgoing (SMTP) server then you also need to tick My server requires authentication here.
You then click on Settings...
... and check that Use same settings as my incoming mail server is ticked, then click on OK |
| Step 12: (Optional) Click on the Connections tab if you wish to specify which Internet connection to use with this account you have just created. The Astrohosts servers should work with any Internet connection so it is possible to leave this box unticked but if you wish to specify a particular connection or ISP tick the box and select the appropriate connection from the drop-down menu. Hint: If you connect to the Internet using ADSL or a cable modem you should probably select Local Area Network.
|
| Step 13: That's it! We're all done. Click OK. Hint: Try testing the system by sending an email to yourself. When you've done that, wait a few seconds then see if you have received it. |


